Azure Resources
Azure Resource Setup
Microsoft Azure is one of the Backend platforms supported by OneCompute. Azure is a cloud platform, and in order to use it, you need to gain access to its cloud resources.
The first thing you will need to do is gain access to an Azure subscription. This should be discussed within your Product Centre due to the costs associated with running calculations in the cloud. Access to Azure subscriptions and creation of new subscriptions can be requested via the VerIT store here. Once you have your subscription you are now ready to create the necessary resources.
To run a compute workload on Azure using Azure Batch you will need two Azure resources:
- Azure Storage account
- Azure Batch account
Before obtaining these it is essential that you have a basic understanding of Azure resources. OneCompute does not aid in the provisioning of Azure resources - this is your responsibility. You can provision Azure resources using the Azure Portal, PowerShell and Azure CLI scripts.
Creating an Azure Storage Account through the Azure Portal
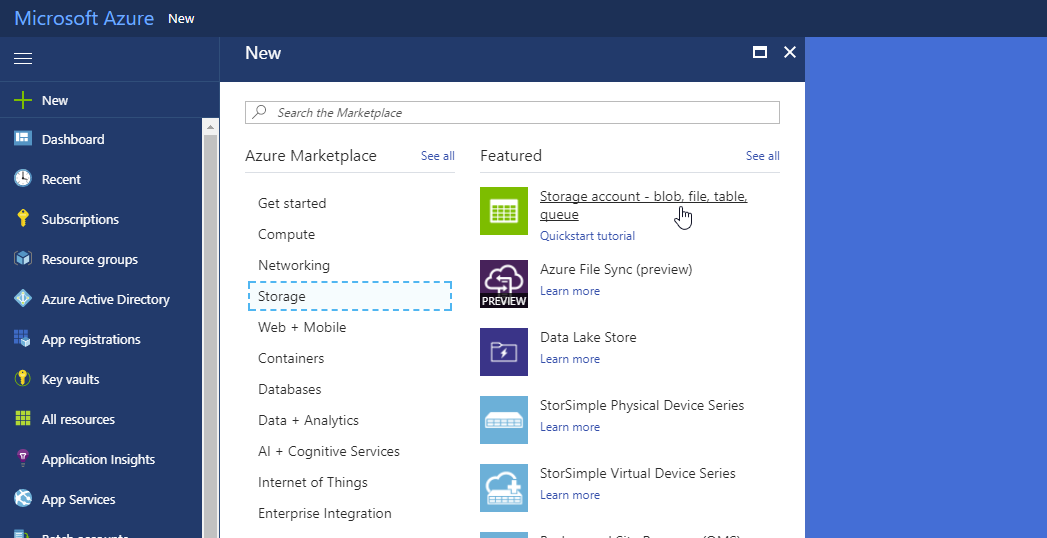
From within the portal, first of all, click on the + New button on the top left to add a new resource to your subscription. And then locate the Storage Account - Blob, File, Table, Queue resource type.
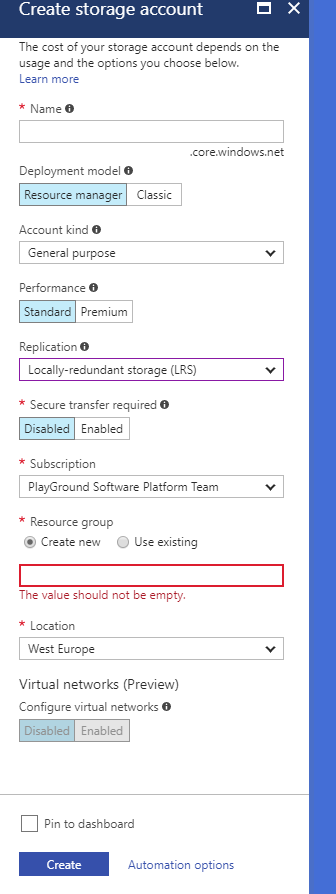
You will then be presented with the Create Storage Account blade. We recommend you configure this as follows:
- Deployment Model: Resource manager
- Account Kind: General purpose
- Performance: Standard
- Replication: Locally-redundant storage (LRS) - unless you need the more expensive options
- Location: Select a region close to you
Creating an Azure Batch Account through the Azure Portal
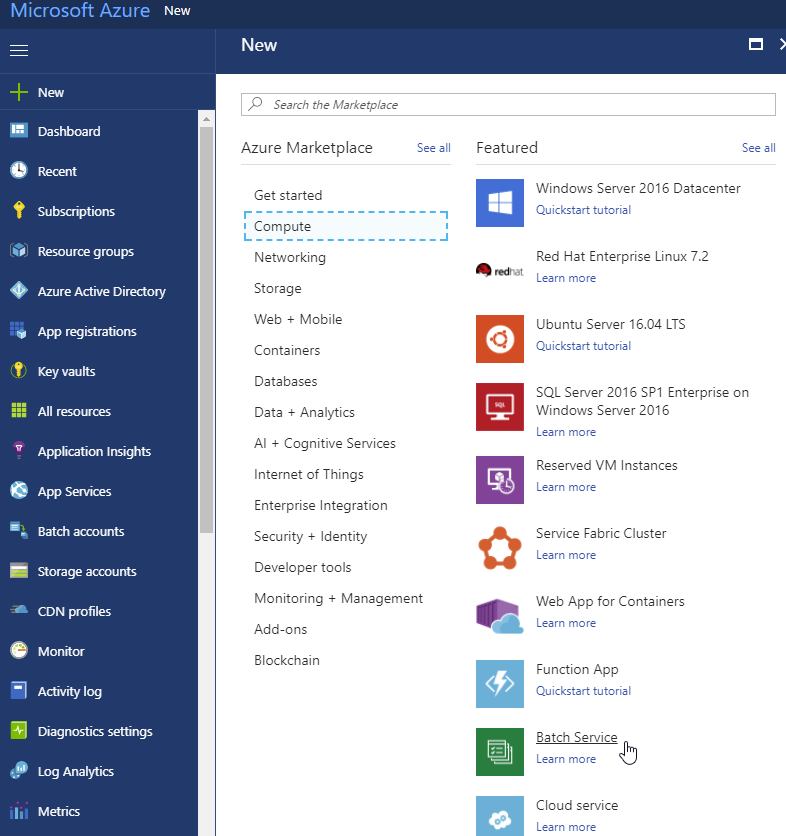
From within the portal, first of all, click on the + New button on the top left to add a new resource to your subscription. And then locate the Batch Service resource type.
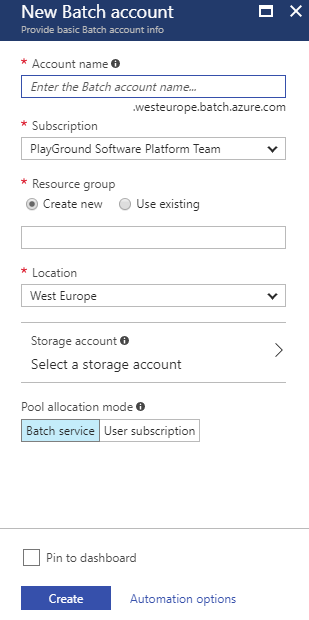
You will then be presented with the New Batch Account blade. We recommend you configure this as follows:
- Location: Select a region close to you
- Storage Account: Recommend you select the storage account created in previous step
- Pool Allocation Mode: Batch Service
At the time of writing (Nov 2017), an Azure Batch Account itself does not incur any charges. In order to run compute workloads in the batch service you need to create a Pool. A Pool is a collection of node(s) that your application will run on.
Please read the Microsoft documentation on Pools here for advice on how to configure it.
Caution
The main cost incurred with Azure Batch is in the running of Nodes. If a Node is running, it incurs cost - whether you are running a workload on it or not. This is your responsibility to monitor.
Resource Credentials
Credentials are needed to grant you access to the Azure resources. OneCompute supports various ways to access these, however the simplest way is with 'shared keys'.
Shared Keys
The following five credentials are required:
- Batch Account URL
- Batch Account Name
- Batch Account Shared Key
- Storage Account Name
- Storage Account Shared Key
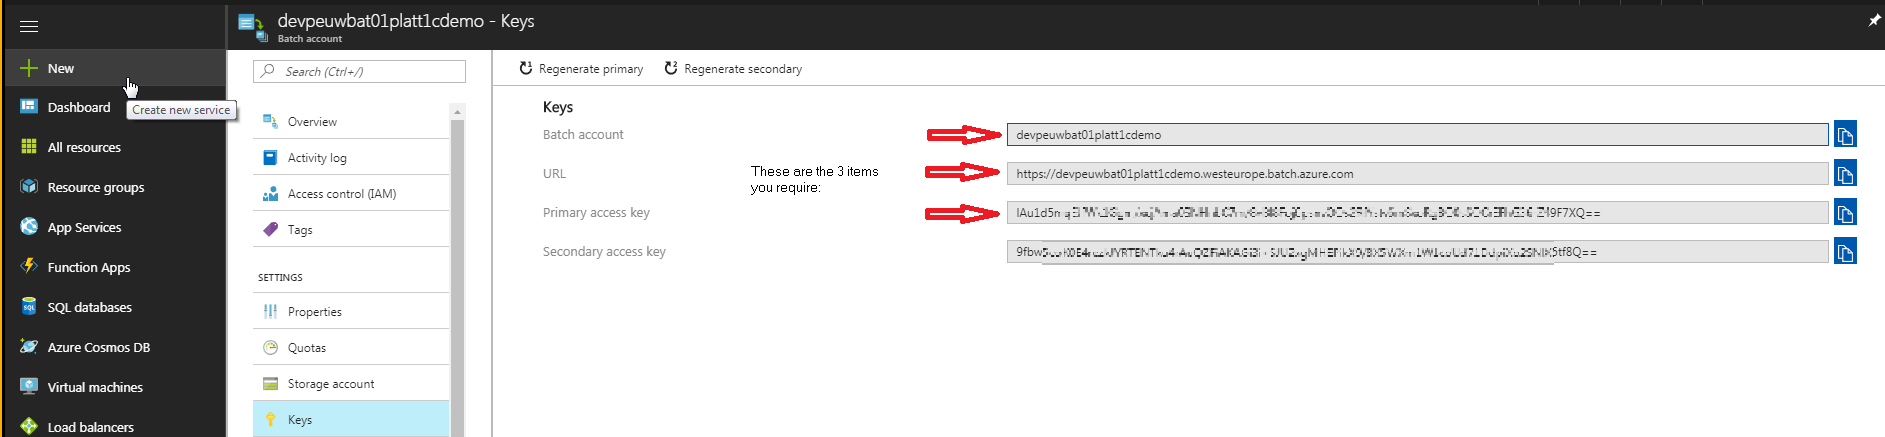
These can be obtained from the Azure Portal.
The following screen captures indicates the five credentials that you require:

Alterative Credential methods
OneCompute also supports further authorization mechanisms of clients such as: Azure AD, Azure Key vault and certificates, these are an advanced topic, please see the security section for details.