Backend Platforms - Azure Batch - Application Package Deployment
Manually deploying Application Packages through the Azure Portal becomes tiresome very quickly. You will likely find that you want to add some automation to this process.
Using the Azure CLI
The Azure CLI is a Microsoft command-line tool for managing Azure resources which supports scripting. You can write an Azure CLI script that will deploy the application package zip file that you have created to your Azure Batch Account.
Tip
To install it on your machine, follow the Microsoft instructions here.
Here is a boilerplate Azure CLI script that will deploy an already created application package zip file to your Azure Batch Account.
Important
You must set the variables in the script to match the resources and package details you require or the script will fail.
#!/bin/bash

# Azure Subscription, Resource Group & Batch Account name variables
azureSubscription="<enter your subscription name>"
azureResourceGroup="<enter your resource group name>"
azureBatchAccountName="<enter your batch account resource name>"

# Variables relating to your application and package
applicationId="myApp123"
applicationDisplayName="My application"
applicationPackageZipFile="my-application-exe.zip"
applicationPackageVersion=1.0
applicationPackageDefaultVersion=1.0

# Authenticate CLI session
# This will cause a message to be echoed out with a code. If you browse to https://microsoft.com/devicelogin, you enter the supplied code and
# then you are able to login through the browser. After successful authentication in the browser, the script will continue executing.
az login

# If your account has access to more than one subscription, ensure that you select the one you want to use
az account set --subscription "$azureSubscription"

# Create a new application under your batch account - this is idempotent
az batch application create \
    --resource-group $azureResourceGroup \
    --name $azureBatchAccountName \
    --application-id "$applicationId" \
    --display-name "$applicationDisplayName"

# An application can reference multiple application executable packages
# of different versions. The executable programs and any dependencies will need
# to be zipped up for the package. Once uploaded, the CLI will attempt
# to activate the package so that it's ready for use.
az batch application package create \
    --resource-group $azureResourceGroup \
    --name $azureBatchAccountName \
    --application-id "$applicationId" \
    --package-file $applicationPackageZipFile \
    --version $applicationPackageVersion

# Update our application to assign the newly added application
# package as the default version
az batch application set \
    --resource-group $azureResourceGroup \
    --name $azureBatchAccountName \
    --application-id "$applicationId" \
    --default-version $applicationPackageDefaultVersion
Using an Azure CLI Docker Container
Alternatively, rather than installing the Azure CLI directly on to your system, if you are a fan of Docker then you can instead use an Azure CLI container which Microsoft provides.
Firstly you need to pull down the docker image:
docker pull microsoft/azure-cli
If you then navigate to a directory that contains a deployment Azure CLI script (.azcli) similar to the above and your application package zip then you can run the azure-cli container and mount your directory into a volume. For example:
docker run -it -v <host-directory-to-mount>:<container-path-to-mount-to> microsoft/azure-cli
You will then be taken into an interactive shell in the container and you can navigate to the path you have mounted your files to. You can then execute your .azcli script as per below:
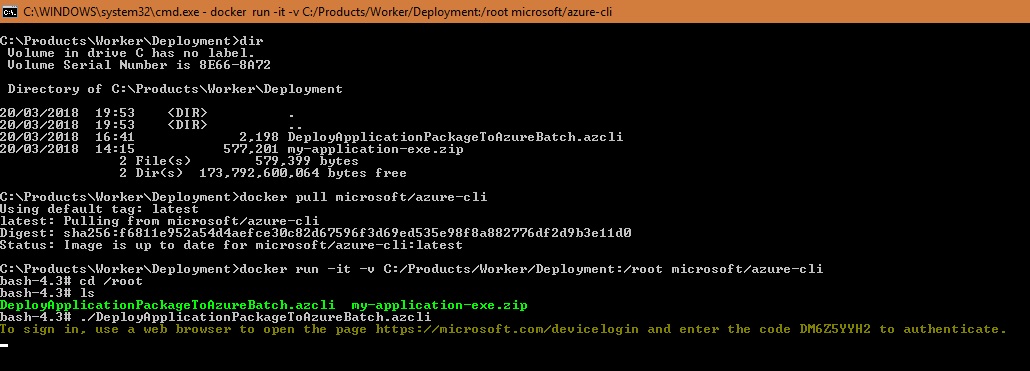
As part of the script, you need to authenticate in order to access the subscription and resources you want to deploy to. As you can see when the script executes, you will be prompted to browse to a Microsoft login page and enter the code that you are provided with...
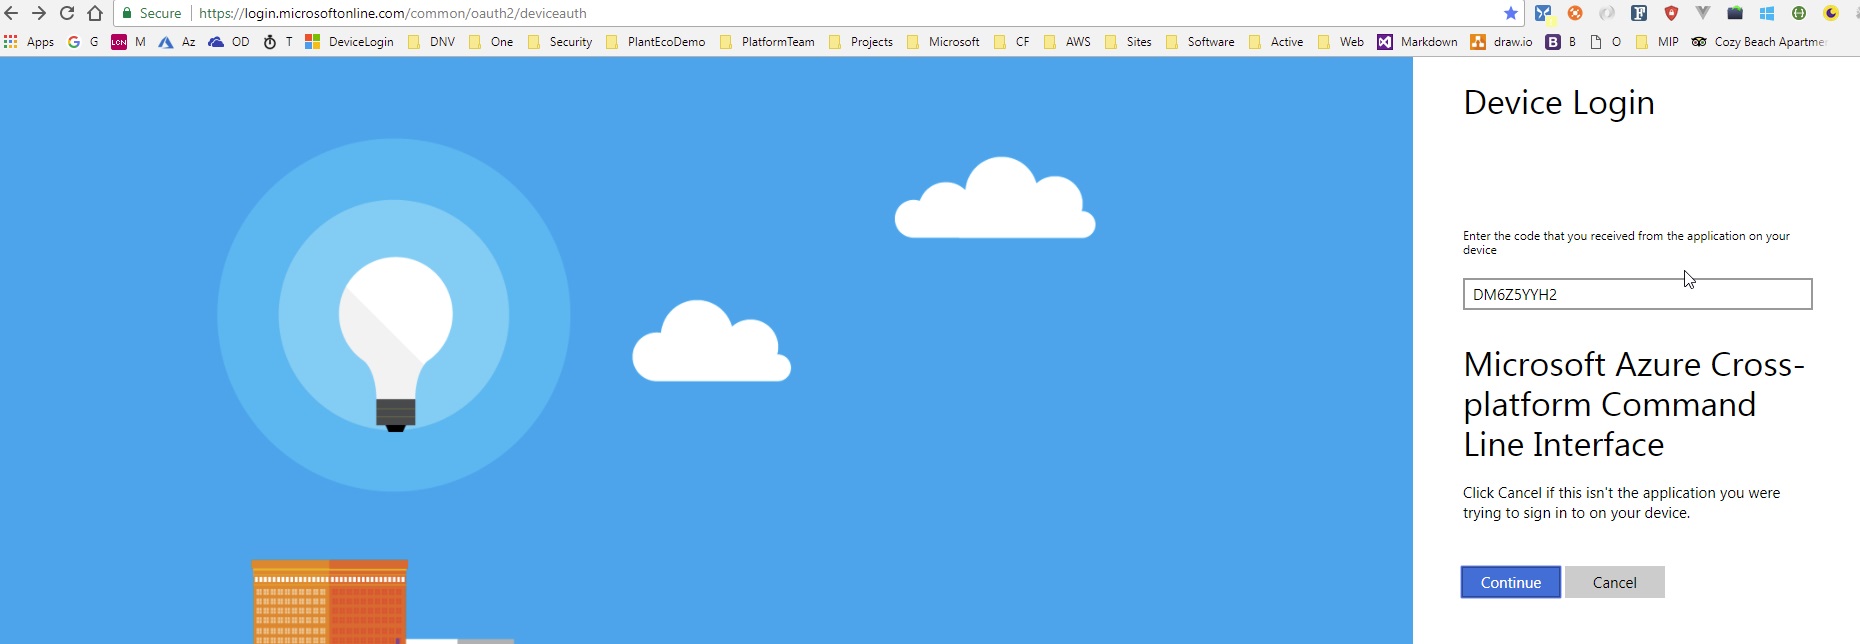
Upon acceptance of this code, you will then be able to authenticate into the appropriate identity.
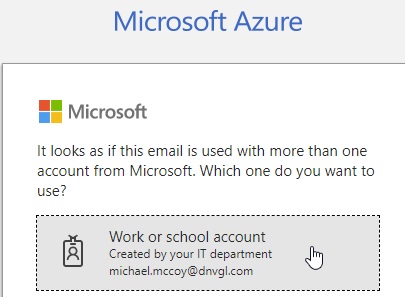
After authenticating you are prompted to close the browser window....

The script will automatically continue to execute and you can see some example output below.
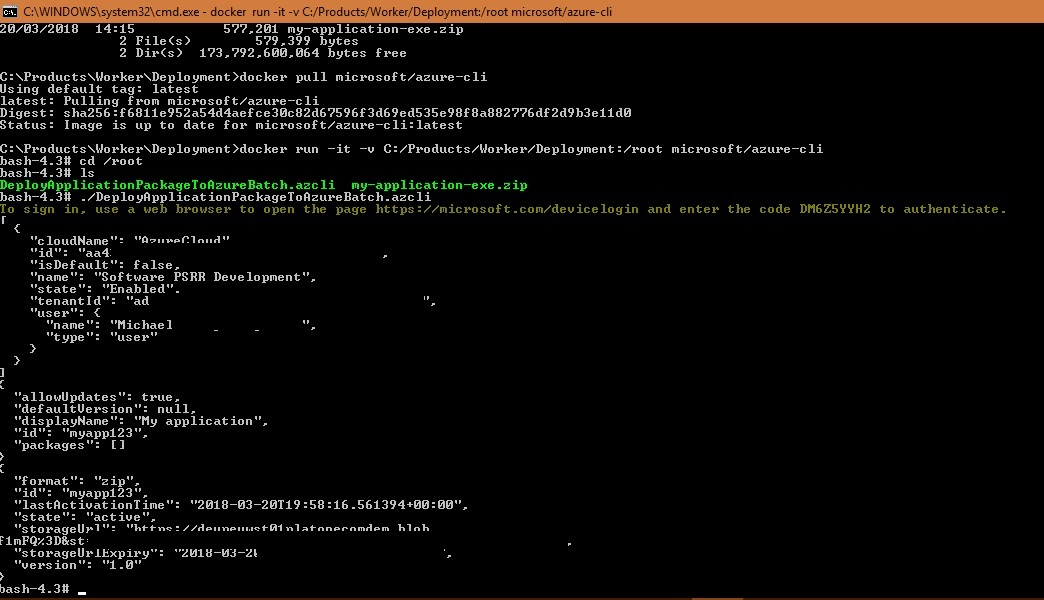
Your application package has now been deployed.
Integrating into your CI/CD pipeline
The deployment automation process above is good for when you are developing but as part of a DevOps pipeline then you will need to add steps to your Continuous Integration/Continuous Deployment (CI/CD) tool set.
Here is an example of how to do this in Azure DevOps (ADO):
Creating an Application Package artifact in ADO
As part of the build phase of your application you will want to generate an artifact that contains one or more of your application package zip files. You can do this by adding two tasks to your build definition.
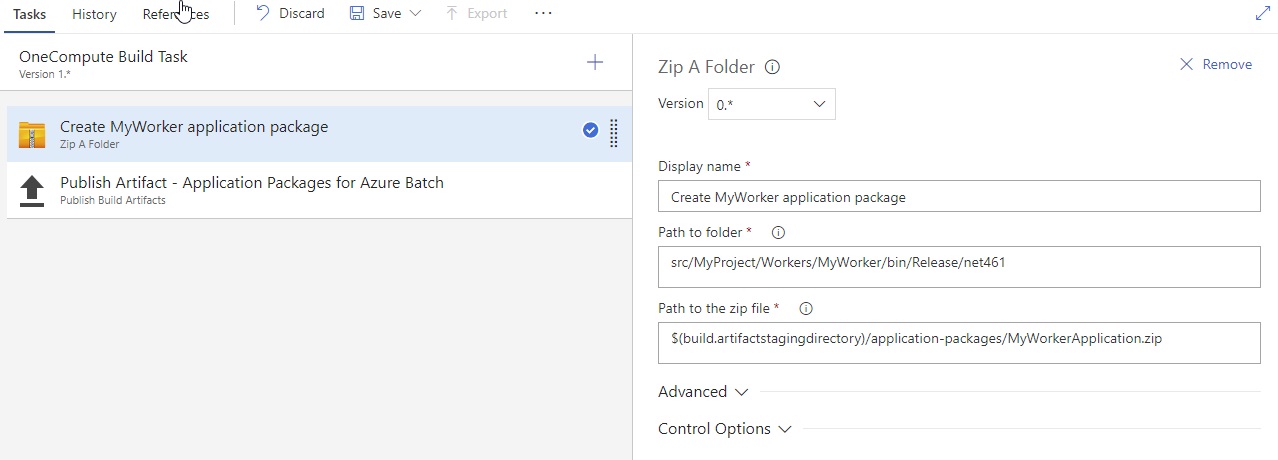
Build Definition - Create worker application package zip file
You firstly add an ADO Zip a Folder task and get it to zip the generated worker application assemblies into a zip file in a staging directory.
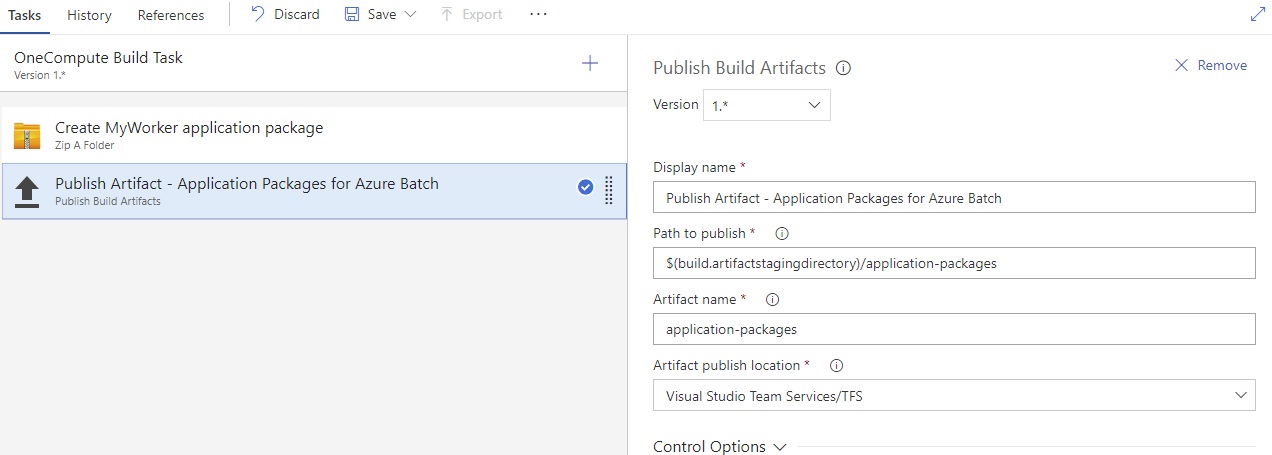
Build Definition - Publish worker application package zip file as a Build Artifact
You then add a Publish Build Artifact task to take these zip files and retain them as a named artifact of your build.
Deploying an application Package to Azure Batch from ADO
Release Definition - Deploy application package to Azure Batch account
In order to actually deploy the application package artifact to Azure Batch we need to use Azure CLI again. However, this time we are using it in the context of an ADO release task.
In your release definition, you need to add an Azure CLI task. You specify the subscription you want to publish to.
You then either define an inline script as per the example below, or you can specify a script path to execute within a build artifact.
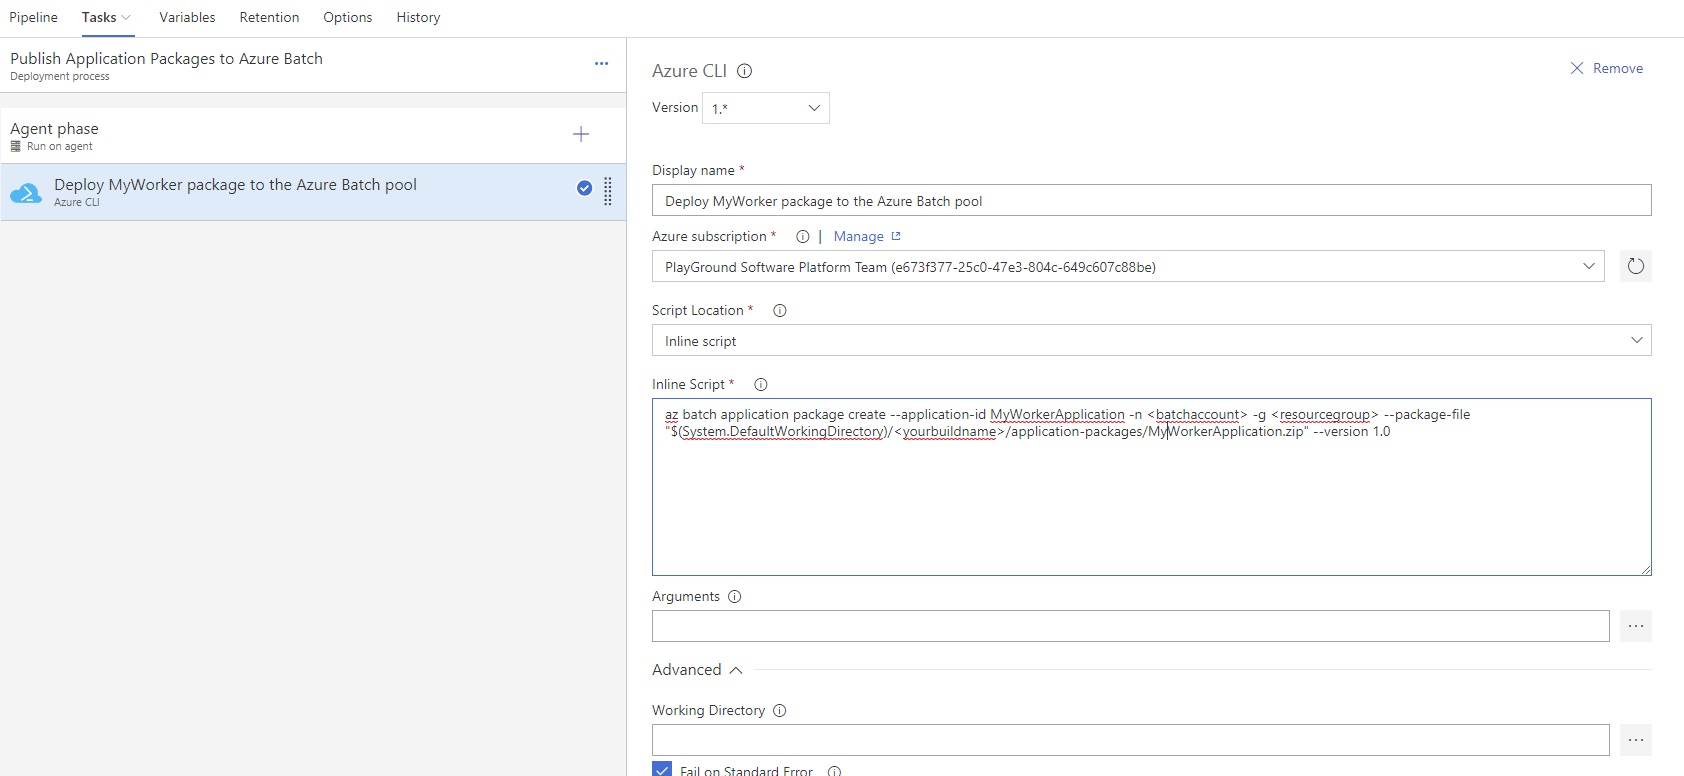
In the example we have provided here we are using an inline script. The script content is here:
az batch application package create --application-id MyWorkerApplication -n <batchAccount> -g <resourceGroup> --package-file "$(System.DefaultWorkingDirectory)/<yourBuildName>/application-packages/MyWorkerApplication.zip" --version 1.0
You need to modify this script to contain the appropriate parameters for your scenario. Namely:
- set the
application-idparameter to be the application id of your Azure Batch application - replace
<batchAccount>with your batch account resource name - replace
<resourceGroup>with the resource group of the batch account - replace
<yourBuildName>with the name of your build definition - ensure that the path to your zip artifact is correct
- specify an appropriate version number for your artifact